 how-to
How to Plan Holiday Exterior Lighting: 2026 Guide
Table of Contents
- Start Planning Holiday Exterior Lighting Before the Season Rush
- Holiday Lighting Design Ideas That Fit Your Home's Architecture
- Outdoor Holiday Lighting Safety: Electrical Loads, Ladders, and Weather
- Your Holiday Light Installation Checklist, Step by Step
- Where to Draw the Line: Landscape, Trees, and Hardscape
- Professional Holiday Light Installation: When Hiring Makes Sense
- Common Planning Mistakes That Cost Time and Money
- Conclusion
- Frequently Asked Questions
Last Updated: October 17, 2026
Start Planning Holiday Exterior Lighting Before the Season Rush
The best time to plan holiday exterior lighting is now, not the week after Thanksgiving.
Holiday exterior lighting is the design, layout, and installation of lights and décor on a home's outside surfaces, from rooflines and entries to trees and hardscape.
Electrical overloads and ladder falls are the two biggest risks, and both trace back to a rushed plan. Below, we walk through the full process, from design ideas to a step-by-step installation checklist.
Holiday Lighting Design Ideas That Fit Your Home's Architecture
Start with the house, not the lights. A two-story colonial, a stone Tudor, and a modern farmhouse each call for a different treatment. The goal is to make the architecture look better, not to bury it.
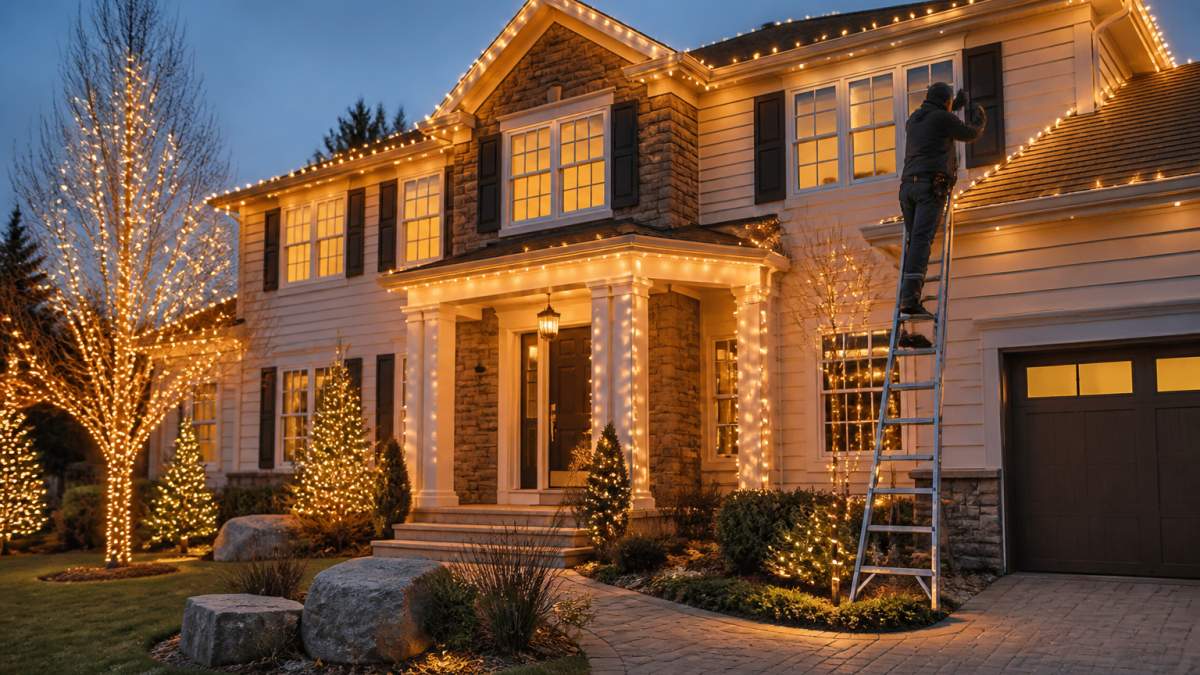
Most guides stop at "warm white on brick, cool white on siding." That is a starting point, not a plan.
Match Color Temperature and Output to the Surface
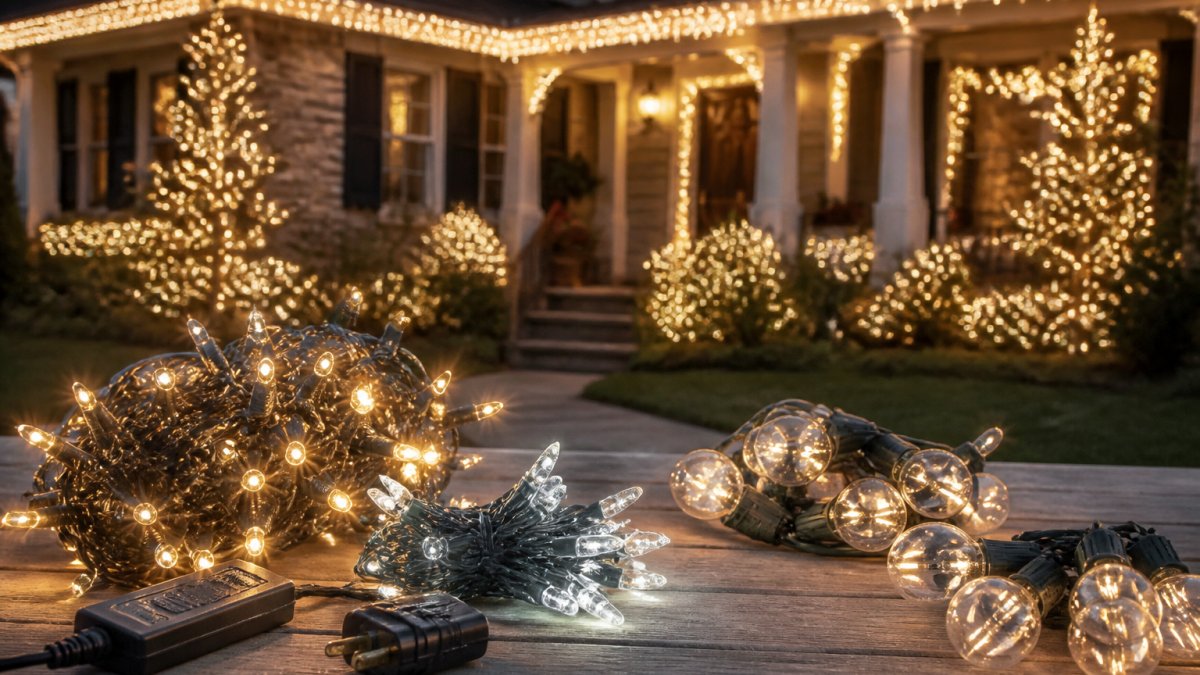
Color temperature is measured in kelvin (K). Warm white (2700K-3000K) reads as traditional and inviting on brick, stone, and wood. Cool white (4000K-5000K) looks crisper on siding, stucco, and modern facades. Daylight white (5000K+) tends to look clinical outdoors and is rarely the right call for a home.
Output matters as much as color. Miniature string lights run roughly 2-5 lumens per bulb, while larger C9 strands run higher.
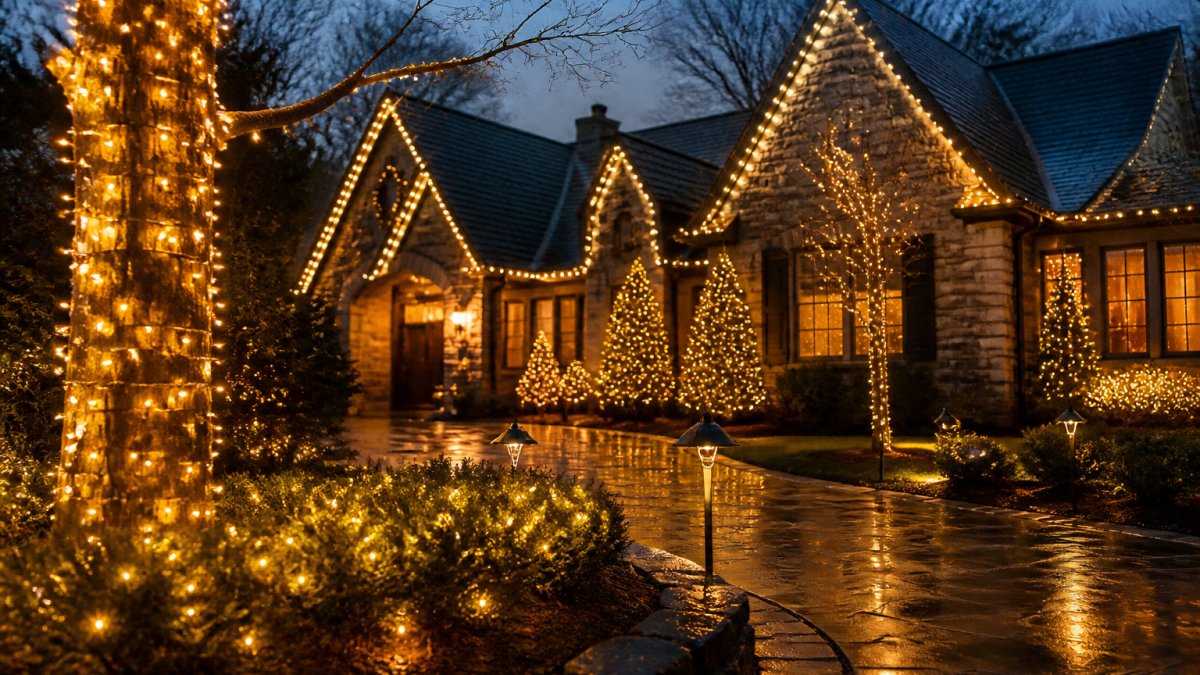
- Rooflines: Trace the main gable and the porch line. Skip every peak if the house has many.
- Entries: Frame the door and columns. This is where guests look first.
- Trees: Wrap trunks and main branches, not the whole canopy.
Climate-Specific Selection Criteria
Weather resistance depends on what your local conditions actually do to the hardware.
- Freeze-thaw cycles: Repeated freezing and thawing stresses cord jackets, sockets, and connectors. Choose cords rated for cold flexibility; bargain wire cracks when bent in freezing weather.
- Rain and snow load: Wet connections are the leading cause of mid-season failures. Choose wet-rated strands and connectors, and plan drip loops at every low point so water runs off rather than into a socket.
- Heat and sun exposure: UV degrades cheap insulation and fades colored bulbs. UV-resistant cord jackets and outdoor-rated bulbs last longer.
Use a Measurable Specification Checklist
Compare products on these criteria, not packaging claims:
- Ingress protection (IP) rating: An IP rating states resistance to solids and water. For outdoor use, look for a rating that explicitly covers water exposure; a higher second digit means better water resistance.
- Wire gauge: Heavier gauge handles more current over longer runs with less voltage drop; thin wire dims toward the end.
- Wattage per strand and per circuit: Know both numbers before you connect anything.
A Selection Workflow for Custom Projects
For anything beyond a single roofline, work through the project in order rather than buying lights first:
- Assess site conditions. Note freeze-thaw exposure, prevailing wind, sun, salt, and expected snow or rain.
- Set design goals. Pick color temperature, focal points, and the look you want from the street.
- Measure the runs. Roofline length, entry height, tree trunk and branch sizes, and wall lengths.
- Specify products against the checklist. Match IP rating, wire gauge, wattage, and connection type to your conditions.
- Order samples and test them. Check color consistency across strands and confirm the connectors seal.
- Review the plan with your installer or a knowledgeable supplier before committing to a full order.
Rooflines, Entries, and Trees: Where Light Belongs
Light belongs on the lines that define the house. Rooflines, door frames, columns, and tree trunks are the anchors. Everything else is accent.
A common mistake is lighting every surface at once, the result looks busy, not festive. Choose two or three focal points per view from the street, then stop, keeping color temperature and output consistent so the display reads as one design.
Outdoor Holiday Lighting Safety: Electrical Loads, Ladders, and Weather
Safety comes down to three things: how much power you draw, how you climb, and what the weather does to your setup. The difference between a safe display and a risky one is usually arithmetic and hardware selection, not luck.
Do the Circuit Math Before You Plug Anything In
Every circuit has a limit, and holiday lights are a continuous load.
To plan:
- Read the wattage on each strand's label (or the bulb count times per-bulb wattage).
- Add up every strand on the circuit, including anything on the same outlet indoors.
- Compare the total to the 80 percent target for that circuit.
- Split the display across multiple circuits if you exceed it, and label which outlet feeds which run.
LED strands change this math dramatically. Because LEDs draw a fraction of the power of incandescent strands, the same circuit can carry far more LED footage, one reason LED is the safer default for large displays. You still do the math, because connectors and extension cords have their own limits.
Never plug more light strands into one outlet than the circuit can handle. Overloaded circuits trip breakers, and in the worst case they start fires. Add up the wattage on every strand before you connect anything, and keep the total under roughly 80 percent of the breaker rating.
Use GFCI Protection and Wet-Rated Hardware
Outdoor circuits should be protected by a ground-fault circuit interrupter (GFCI), which shuts off power when it detects current leaking to ground, the exact failure mode that causes shocks in wet conditions. GFCIs are required for outdoor receptacles by the National Electrical Code and come as receptacles, breakers, or portable inline units. Test the GFCI before the season and after any tripping event.
Hardware selection matters as much as the circuit:
- Use only strands, cords, and connectors rated for outdoor and wet locations.
- Keep plugs off the ground and out of standing water; form a drip loop at every low point so water runs off the cord rather than into the connection.
- Use sealed, end-to-end connectors where available; open plugs collect moisture.
Plan for Weather Failure Modes
Weather causes specific failures you can plan around:
- Freeze-thaw: Cord jackets stiffen and crack in cold, and ice can pull down unsecured runs. Use cold-flexible cord and secure runs mechanically rather than relying on tension.
- Rain and snow: Water intrusion at connectors is the most common mid-season failure. Drip loops, sealed connectors, and keeping plugs elevated prevent most of it.
- Wind: Loose strands and inflatables become projectiles. Fasten with clips rated for the surface, and take down or deflate anything that cannot be secured when high wind is forecast.
Ladder and Access Safety
Most holiday-lighting injuries are falls, not shocks. Keep three points of contact, set the ladder base on level ground, and never reach past your shoulder. Do not climb with your hands full, hoist materials or have a helper pass them up. Keep the ladder away from power lines, and never work on a roof in wet, icy, or windy conditions.
- Use GFCI-protected outlets for anything outdoors.
- Check strands for frayed wires and cracked sockets before hanging.
- Replace damaged strands instead of taping them.
Test every strand on the ground before it goes up. One dead section found on the roof means a second climb. One found on the lawn takes two minutes to swap. Test the GFCI at the same time so you know the protection is working before the display goes live.
Know the Fire Risk
The U.S. Consumer Product Safety Commission publishes guidance on holiday light safety and recalls, and the National Fire Protection Association notes that holiday decorations are a seasonal fire risk. Keep lights away from dry greenery, never run cords under rugs or through doorways, and turn everything off before you go to bed. LED strands run cooler than incandescent, which lowers, but does not eliminate, the risk around dry materials.
Safety is arithmetic plus hardware. Keep each circuit under roughly 80 percent of its breaker rating, protect outdoor outlets with GFCI, use wet-rated cords and sealed connectors with drip loops, and plan for freeze-thaw, rain, wind, and sun before the first strand goes up.
Your Holiday Light Installation Checklist, Step by Step
A good holiday light installation checklist saves hours and prevents most accidents. Work top to bottom, test as you go, and never climb with your hands full.
Here is the order we use:
- Set a budget and a look. Decide warm or cool white, and how many focal points you want.
- Measure the runs. Note roofline length, entry height, and tree trunk sizes.
- Count your power. Add up strand wattage and match it to your circuits.
- Test every strand on the ground and replace dead bulbs.
- Map the layout on paper or your phone before you climb.
- Hang the highest runs first, working down toward the ground.
- Secure every connection and keep plugs dry.
- Do a night test from the street and adjust as needed.
Measure, Map, and Test Before You Climb
Measuring first is the step most people skip. Walk the property with a tape and a notepad. Write down each run, then add a little extra for slack and corners.
Mapping the layout turns a vague idea into a plan you can follow. Mark where each strand starts and ends, and where the power comes from. Test every strand before it leaves the ground.
Where to Draw the Line: Landscape, Trees, and Hardscape
Landscape lighting can make or break a display. A few well-placed lights on trees and stone walls look elegant. Lights on every shrub look cluttered.
Trees are the biggest win. Wrap the trunks of two or three prominent trees near the entry and leave the rest alone.
The National Fire Protection Association notes that holiday decorations are a seasonal fire risk, so keep lights away from dry greenery and never run cords under rugs or through doorways.
- Light tree trunks, not full canopies.
- Wash low walls and steps for safety.
- Skip the lawn inflatables if the wind is strong.
The best displays use restraint. Two or three strong focal points read better from the street than a house covered edge to edge.
Professional Holiday Light Installation: When Hiring Makes Sense
Hiring a pro makes sense when the roofline is steep, the trees are tall, your schedule is full, or you want a design that matches a high-end property.
Professional holiday light installation covers design, materials, hanging, maintenance, and takedown. The crew brings commercial-grade strands, the right ladders and lifts, and insurance if something goes wrong.
Four Seasons Landscaping NY handles holiday lighting and décor as part of our full outdoor service.
| Situation | DIY | Hire a Pro |
|---|---|---|
| Single-story roofline | Good fit | Optional |
| Steep or tall roof | Risky | Best choice |
| Tall trees | Risky | Best choice |
| Full design and décor | Time-consuming | Best choice |
| Busy schedule | Stressful | Best choice |
Common Planning Mistakes That Cost Time and Money
Most lighting problems start with the plan, not the install. Here are the mistakes we see most often:
- Buying lights before measuring. You end up short on one run and long on another.
- Mixing color temperatures. Warm and cool white side by side look mismatched.
- Skipping the ground test. Dead strands go up and come right back down.
Each of these costs time, money, or both, a short planning session prevents all of them.
Conclusion
Planning holiday exterior lighting early is the difference between a display you love and one you settle for. Measure, map, test, and book your installer before the calendar fills.
If you would rather skip the ladder work entirely, Four Seasons Landscaping NY can design, install, and remove your holiday lighting and décor. We bring 20+ years of experience, fully insured crews, and transparent quotes with no hidden fees.
Frequently Asked Questions
When should you start planning holiday exterior lighting?
Start planning in late September or early October. That gives you time to measure your rooflines, decide on a design, test last year's strands, and book a professional crew before schedules fill. Professional holiday light installation calendars in Westchester County often close by early November, so early planning protects your preferred install window. Waiting until Thanksgiving week usually means limited options and rushed work.
How do you plan holiday lights for the outside of a house?
Work in layers: rooflines first, then entryways and columns, then trees and shrubs. Measure each run, count outlets, and sketch the layout on paper before buying anything. Match bulb color temperature across all strands so the display looks intentional. For holiday exterior lighting, decide early whether you will install it yourself or hire a crew, because that choice affects your timeline and how much you buy in advance.
What are the most important outdoor holiday lighting safety rules?
Use only UL-listed lights rated for outdoor use, and plug everything into GFCI-protected outlets. Never overload a circuit; check the wattage on each strand's tag. Keep ladders on level ground and away from power lines, and avoid stapling through wire. Outdoor holiday lighting safety also means checking cords for cracks before installation and keeping connections off the ground and out of standing water.
Should you hire a professional for holiday light installation?
Hiring makes sense when your rooflines are steep or tall, when you want a cohesive design across trees and architecture, or when your schedule leaves no room for setup and takedown. Professional holiday light installation usually includes design, commercial-grade strands, maintenance during the season, and removal in January. Get a written quote that lists what is included so there are no surprise charges later.