 how-to
Commercial Snow Removal Safety Tips: A 2026 Guide
Table of Contents
- Develop a Pre-Season Snow Management Plan
- Inspect Your Property and Identify Hazards Before Winter
- Create a Commercial Snow Removal Safety Checklist
- Commercial Snow Plow Safety and Equipment Operation
- Commercial Snow Blower Safety for Your Team
- Snow Removal Safety for Employees During Active Operations
- Post-Removal Inspection and Ice Control
- Frequently Asked Questions
Last Updated: October 14, 2026
Develop a Pre-Season Snow Management Plan
Safe commercial snow removal starts before the first flake falls. A plan that only says "clear the lot" is a wish, not a plan. What separates a workable program from a generic one is a written job hazard analysis (JHA) for each property, plus site-specific procedures telling crews what to do, where, and in what order.
Start With a Site-Specific Job Hazard Analysis
A JHA breaks each task into steps, identifies hazards, and assigns a control. Run one JHA per task type, plowing, shoveling walkways, snowblowing entrances, applying de-icer, and hauling snow off site. A four-column format works:
| Task Step | Hazard | Risk Level | Control |
|---|---|---|---|
| Backing plow out of tight stall | Struck-by pedestrian, vehicle strike | High | Spotter required, backup alarm verified, mirrors adjusted before shift |
| Shoveling entrance ramp | Slip/fall, overexertion | Medium | Slip-resistant boots, push-don't-lift technique, 30-minute rotation |
| Snowblower on loading dock | Auger contact, thrown debris | High | Engine off before clearing chute, chute aimed away from doors, eye protection |
| Applying de-icer to steps | Chemical exposure, surface damage | Medium | Gloves and eye protection, calibrated spreader, no application within 3 feet of landscaping |
Walk the property in fall and build the JHA from what you see, not a template. A JHA written for a flat strip mall will miss the hazards of a sloped parking deck, covered entry, or loading dock with a blind corner.
Map Zones and Set Priority Tiers
Identify every area needing clearing, parking lots, drive lanes, walkways, entrance ramps, steps, accessible paths, fire lanes, loading zones, then assign each a priority tier based on foot traffic and safety consequence:
- Tier 1, Life-safety and access: fire lanes, emergency exits, accessible routes, ambulance and fire department access points. These get cleared first and re-checked last.
- Tier 2, Primary pedestrian and vehicle flow: main entrances, sidewalks between buildings, drive-through lanes, high-traffic walkways.
- Tier 3, Secondary areas: overflow parking, back-of-house walkways, less-used side entrances.
Document each zone's tier on a site map. When a storm drops more snow than the crew can clear at once, the tiers tell everyone what to do without a phone call.
Assign Tasks and Define Triggers
Decide in advance who handles what. For an internal team, name the crew lead, equipment operator, and shoveling crew, and confirm callout coverage. For an external contractor, put the assignment in writing.
Set weather triggers in the plan. Common patterns are:
- Pre-treatment trigger: forecast of freezing rain, sleet, or any accumulation, applied before precipitation starts.
- Initial plow trigger: typically 1 to 2 inches of accumulation on paved surfaces, adjusted for the property's traffic and surface type.
- Re-service trigger: any new accumulation after the initial pass, or any refreeze observed during inspection.
Specify how quickly snow must be cleared after accumulation stops. Many commercial leases and municipal ordinances set a deadline, so confirm your property's requirement and write it into the plan.
Document and Test the Plan
Put the JHA, zone map, tier list, task assignments, triggers, and communication protocol in one document. Give a copy to every crew member and the property manager. Test the communication chain before the first storm so nobody is figuring out how to reach the crew at 4 a.m.
Review the plan with everyone involved so operators, shoveling crews, and management understand their roles. Update the JHA whenever the property layout changes, a new tenant, repaved lot, or relocated dumpster can change the hazards.
Inspect Your Property and Identify Hazards Before Winter
Walk your entire property in fall and document what you find.
Examine lighting around entrances, parking areas, and walkways. Poor visibility during early morning or evening operations increases accident risk.
Check your equipment: plows need working lights, backup alarms, and clear operator visibility; snowblowers need proper guards and controls; shovels need non-slip handles.
Document all hazards with photos and dates to create a record of conditions, and share findings with your team and contractor.
Create a Commercial Snow Removal Safety Checklist
A written checklist keeps operations consistent and prevents shortcuts. Your commercial snow removal safety checklist should cover equipment, personnel, and procedures.
Equipment Inspection Checklist:
- Snow plow lights functioning (headlights, backup lights, warning lights)
- Backup alarm audible and working
- Plow blade secure and properly angled
- Snowblower chute and discharge clear of obstruction
- All safety guards in place
- Fuel levels adequate
Personnel Safety Checklist:
- All operators trained and certified
- High-visibility clothing worn by all workers
- Proper footwear with slip-resistant soles
- Warm layers appropriate to temperature
- Hydration stations accessible
- Rest breaks scheduled every 2 hours
- First aid kit on site and accessible
Operational Checklist:
- Weather forecast reviewed before operations start
- Pedestrian and vehicle traffic separated during active removal
- Snow piles positioned away from walkways and sight lines
- De-icing materials applied only as needed
- Post-removal inspection completed before area opens to public
- Incident reporting system ready if needed
Print your checklist and complete it before each operation, with a supervisor or manager sign-off. Keep the records, they demonstrate you followed a safety process.
Commercial Snow Plow Safety and Equipment Operation
A snow plow demands respect. Operators must understand the machine, the environment, and the risks.
Proper training is non-negotiable.
Visibility is critical.
Speed matters. Plowing slowly gives the operator more control and pedestrians more time to react; fast plowing in crowded areas is dangerous.
Equipment maintenance prevents breakdowns and accidents. Check fluid levels, tire pressure, and lights before each shift.
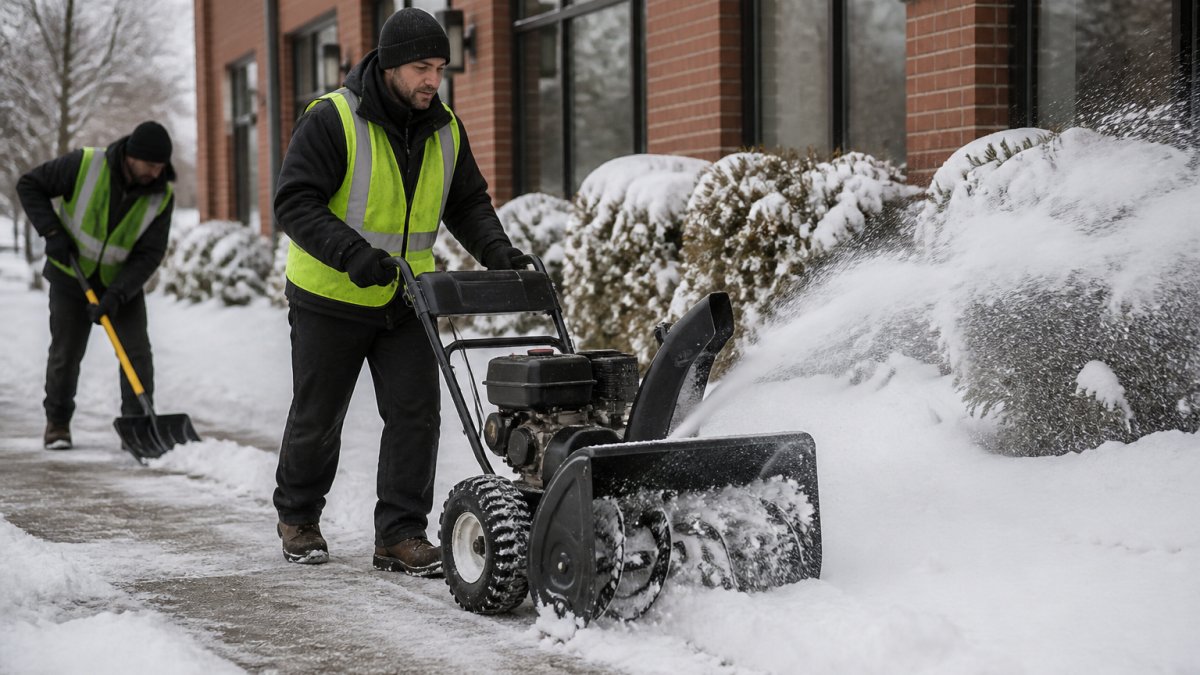
Commercial Snow Blower Safety for Your Team
Snowblowers are efficient but dangerous if misused. The discharge chute can throw ice chunks at high speed.
Never reach into the chute to clear a jam while the engine is running.
Stand to the side of the discharge chute, never in front of it.
Snowblowers produce noise that can damage hearing, so operators should wear ear protection.
Fatigue affects safety. Snowblower work is physically demanding.
Snow Removal Safety for Employees During Active Operations
Shoveling looks simple but causes real injuries.
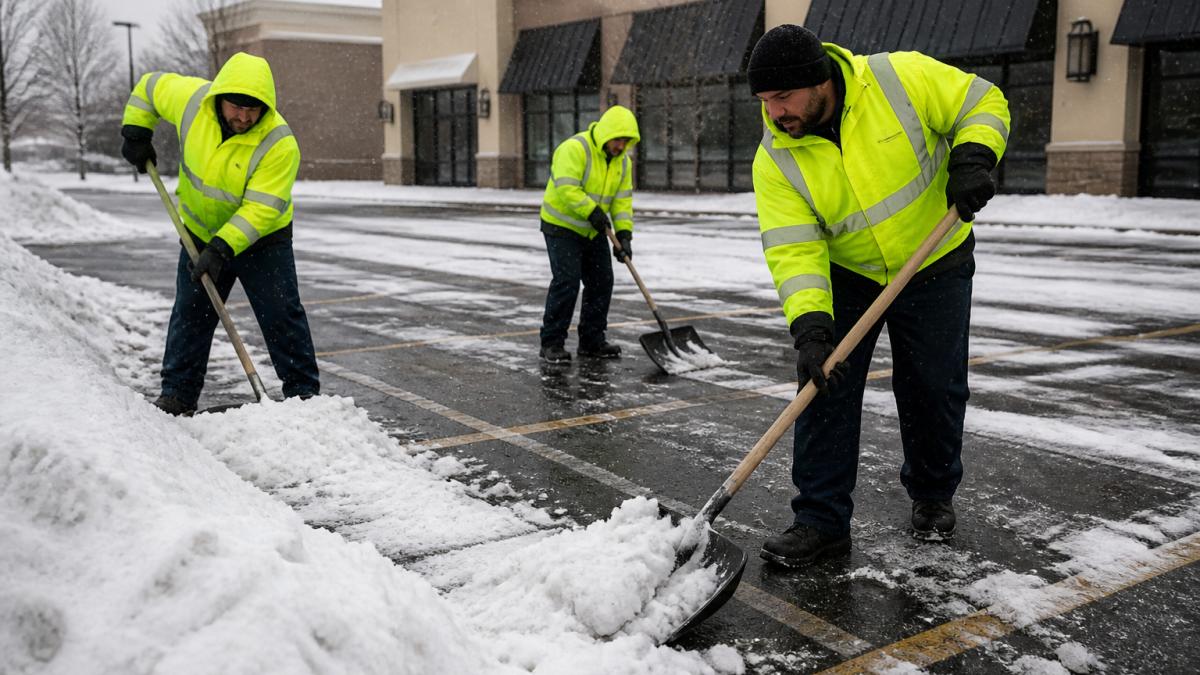
Warm up before starting. Five minutes of light stretching prepares your muscles for work.
Take regular breaks, cold-weather work is harder on your body.
Watch for signs of overexertion: chest pain, shortness of breath, dizziness, or nausea.
Dress in layers so you can shed them as you warm up and avoid the sweat-then-chill cycle.
Footwear matters, boots need slip-resistant soles and good ankle support on wet, icy surfaces.
Post-Removal Inspection and Ice Control
After snow removal, your work isn't done. A final inspection catches problems before customers or employees encounter them and turns a general safety tip into a defensible record. Inspect against measurable criteria, especially for accessible routes, and document what you found.
Verify Accessible Routes Against Measurable Checks
An accessible route is not "mostly clear." Walk each one and verify:
- Clear width: the full route is free of snow, ice, and piled snow for its entire length, not just the center. Snow pushed to the edges can narrow the path below the usable width.
- Ramps and curb cuts: the transition from sidewalk to parking lot, and any ramp surface, is fully cleared and free of refreeze. A cleared ramp with an icy curb cut still blocks access.
- Entrances and door swings: the landing in front of each door is clear enough for a wheelchair or walker to maneuver, and door swings are not blocked by snow piles.
- Handrails and grab bars: exposed and free of ice, so users can grip them.
- Signage and detectable warnings: not buried under snow or ice.
- Continuous route: the accessible path connects the accessible parking spaces to the building entrance without a gap. A cleared sidewalk that dead-ends at an uncleared curb is not an accessible route.
If any check fails, treat it as an open item and re-service before the area opens to the public, recording the check, time, and corrective action.
Inspect for Ice and Refreeze
Snow removal often exposes ice underneath, and meltwater crossing a cleared surface can refreeze overnight. Walk the property and look for:
- Refreeze zones: shaded areas, north-facing walkways, downspout discharge paths, and low spots where meltwater pools.
- Black ice: thin, clear ice that is easy to miss on dark pavement. Check early morning and after any temperature drop.
- Snow piles that drain onto walkways: reposition or remove them so meltwater does not run across a cleared path.
- Storm drains: keep them clear so meltwater has somewhere to go instead of pooling and refreezing.
Apply De-Icing Materials With a Plan
De-icing is a treatment, not a blanket. Overuse wastes material and damages concrete, metal, and landscaping; underuse leaves hazards. Match the material to the temperature and surface:
- Sodium chloride (rock salt): effective in moderate cold, widely available, but can damage concrete and vegetation with heavy use.
- Calcium chloride: works at lower temperatures than salt and releases heat as it dissolves, but is more expensive and can be aggressive on some surfaces.
- Magnesium chloride: less corrosive to concrete and metal than salt, works at lower temperatures, and is often used where surface damage is a concern.
- Blends and treated abrasives: some products combine a de-icer with sand or other grit for traction; useful on slopes and in extreme cold where straight salt is ineffective.
Apply only where needed, high-traffic walkways, ramps, steps, and entrances, and keep material away from landscaping beds, storm drains, and foundations where runoff causes damage. Use a calibrated spreader for consistent application.
Re-Inspect and Document
Inspect again after 24 hours, or sooner if temperatures drop or precipitation continues. If new ice formed or snow blew back into cleared areas, re-treat and re-clear.
Document every inspection: dated photos of cleared areas, hazards found, and the corrective action and time. Keep records with the pre-season plan and completed safety checklists, this shows you followed a safety process and is the first thing a property manager or insurer will ask for after a slip-and-fall claim.
Frequently Asked Questions
What safety precautions should commercial snow removal crews take?
Commercial snow removal crews should monitor weather conditions continuously, inspect equipment before each use, wear high-visibility clothing and safety gear, maintain clear sightlines around vehicles and equipment, separate pedestrian and vehicle traffic zones, and rotate workers to prevent fatigue and overexertion. Crews should also warm up and stretch before physical work, stay hydrated, and follow site-specific operating procedures established in your snow management plan. Regular equipment maintenance and backup alarm functionality are essential for preventing accidents.
How should businesses prepare a property for commercial snow removal?
Begin with a pre-season inspection of parking lots, walkways, entrances, ramps, and steps to identify hazards like cracked pavement or potholes. Mark drainage areas, storm drains, and obstacles that snow equipment operators need to avoid. Establish clear pathways for pedestrian and vehicle traffic, and designate snow pile locations away from building entrances and fire exits. Document your site layout and share it with your snow removal contractor. Install warning devices and ensure adequate lighting around active removal areas. Create a communication protocol for reporting hazards or service issues.
When should snow be cleared from commercial walkways and entrances?
Snow and ice should be cleared from walkways, entrances, steps, and ramps promptly after accumulation to maintain accessible routes for pedestrians and customers. Most commercial properties should aim to clear high-traffic areas within hours of significant snowfall. Establish response time expectations in your contract with your snow removal contractor, and monitor weather forecasts to initiate removal before conditions worsen. Post warning devices and maintain full-width cleared paths to prevent slip-and-fall injuries. Regular monitoring throughout the day during active snowfall ensures continuous accessibility and safety.
What should workers avoid when plowing or shoveling snow?
Workers should avoid lifting heavy snow, push rather than lift whenever possible to prevent muscle strain and cardiac emergencies. Never rush or overexert yourself; take breaks regularly, especially in cold conditions. Avoid backing up equipment without a spotter or backup alarm activated. Don't operate equipment with reduced visibility or in poor lighting. Avoid working while fatigued or without proper warm-up and stretching. Never remove safety guards from equipment or skip pre-operation inspections. Avoid mixing pedestrian and vehicle traffic in active removal zones, and don't leave equipment running unattended.