 how-to
Modern Irrigation System Installation Tips for 2026
Table of Contents
- Modern Irrigation System Installation Tips: Planning Your Layout First
- Tools, Fittings, and Filtration You Actually Need
- Connecting to the Water Source and Managing Pressure
- Running Mainline Tubing and Lateral Lines
- Drip Irrigation Installation Best Practices for Emitters and Zones
- Smart Irrigation Controller Setup and Soil-Specific Scheduling
- Testing, Leak Detection, and Your Irrigation System Maintenance Checklist
- Frequently Asked Questions
Last Updated: September 12, 2026
Modern Irrigation System Installation Tips: Planning Your Layout First
Modern irrigation system installation tips start with a simple truth: the layout you draw before you dig determines how well the system performs for the next decade. At Four Seasons Landscaping NY, we've spent more than 20 years installing and maintaining irrigation across Westchester County, and the failures we get called to fix almost always trace back to planning shortcuts, not bad parts.
A proper irrigation system installation begins with a site walk that maps sun exposure, soil type, and plant water needs zone by zone. The EPA WaterSense irrigation guidance recommends designing for plant water requirements rather than watering on a fixed schedule, because turf, beds, and shade plantings rarely need the same volume.
Here's the part most guides skip: your zones should follow the plants, not the property lines.
Mapping Zones by Sun, Soil, and Plant Type
Zone mapping is the process of grouping plants with similar water needs onto a single valve so each zone can be scheduled independently. A sunny lawn zone might run twice as long as a shaded shrub bed, and separating them prevents both underwatering and runoff.
Start with a simple sketch:
- Full-sun turf: highest flow demand, separate valve
- Shade beds: lower demand, shorter runtime
- Mixed borders: split by soil type, since sandy soil drains faster than clay
- Slopes: shorter, more frequent cycles to prevent runoff
Soil matters more than most homeowners expect. Sandy soil needs shorter runtimes repeated more often; clay soil absorbs slowly and benefits from cycle-and-soak scheduling. That single adjustment fixes more dry spots than swapping emitters ever will.
Tools, Fittings, and Filtration You Actually Need
A parts list without sizing logic is how DIY systems end up with weak far-end emitters and clogged drippers. Before you buy anything, decide three numbers: the flow rate of your water source (gallons per minute, or GPM), the static pressure at the hose bib (PSI), and the total length of each lateral run. Every component below is chosen to satisfy those three numbers.
Start with the source test. Thread a pressure gauge onto the hose bib and open the valve fully. Then time how long it takes to fill a one-gallon container, that gives you GPM. Most residential hose bibs deliver somewhere in the range of 8 to 12 GPM at 40 to 80 PSI, but the only number that matters is yours (the EPA). Write both figures down; you'll use them for every zone.
Core components, and why each one exists:
- Backflow preventer, keeps irrigation water from siphoning back into household supply. Most plumbing codes require one on any connection to potable water, and a hose-bib vacuum breaker is the minimum for a simple drip setup.
- Inline filter (150 to 200 mesh), drip emitters have tiny orifices; a 200-mesh screen catches the fine grit that a 150-mesh lets through. Cleaner water means fewer clogs, which is the single biggest cause of dead spots in year two.
- Pressure regulator, most drip emitters are rated around 20 to 30 PSI. If your static pressure is above that, a regulator isn't optional. Choose one rated for the flow your zone will actually draw, not the highest number on the shelf.
- 1/2-inch mainline tubing, carries water from the source to each zone. Polyethylene is the standard; look for UV-resistant formulation if any run stays above mulch.
- 1/4-inch micro-tubing and emitters, delivers water to individual plants. Match emitter flow (commonly 0.5, 1, or 2 gallons per hour) to plant size and soil type.
- Punch tool, tubing cutter, goof plugs, the punch tool makes clean holes in mainline; goof plugs seal holes you punched in the wrong spot. Buy a few extra plugs.
- Barbed fittings, couplings, tees, and end caps, every connection is a potential leak. Compression-style fittings hold better than push-fit on polyethylene, especially after a season of thermal expansion.
A sizing rule worth memorizing: keep total emitter flow on any 1/2-inch zone under roughly 200 gallons per hour. Add up the GPH of every emitter on the zone; if the total exceeds that, split the zone or step up to 3/4-inch mainline. This is the number that prevents the classic complaint, "the last emitters barely drip."
Filtration placement matters. Install the filter after the backflow preventer and before the pressure regulator, so debris is caught before it reaches the regulator's diaphragm. A regulator downstream of a dirty filter will drift out of spec and quietly over-pressure the whole zone.
What you can skip: fancy emitter tools, pre-assembled kits with fixed emitter counts, and any "universal" regulator that doesn't list its flow range. Kits are convenient but rarely match your zone layout, and you'll end up buying the parts you actually need anyway.
Connecting to the Water Source and Managing Pressure
Connection starts at the hose bib or a dedicated valve, and pressure management is where DIY systems live or die. Most drip emitters are rated for roughly 20 to 30 PSI, while household supply often runs considerably higher, so a regulator isn't optional.
Install in this order: backflow preventer, then filter, then pressure regulator, then the manifold that feeds your zones. A backflow preventer protects your drinking water from contamination, and many municipalities require one, so check local code before you cut anything.
A pressure gauge on the manifold lets you verify actual operating pressure instead of guessing. If pressure drops when multiple zones run at once, you've found a flow problem worth solving before it becomes a dead lawn.
Running Mainline Tubing and Lateral Lines
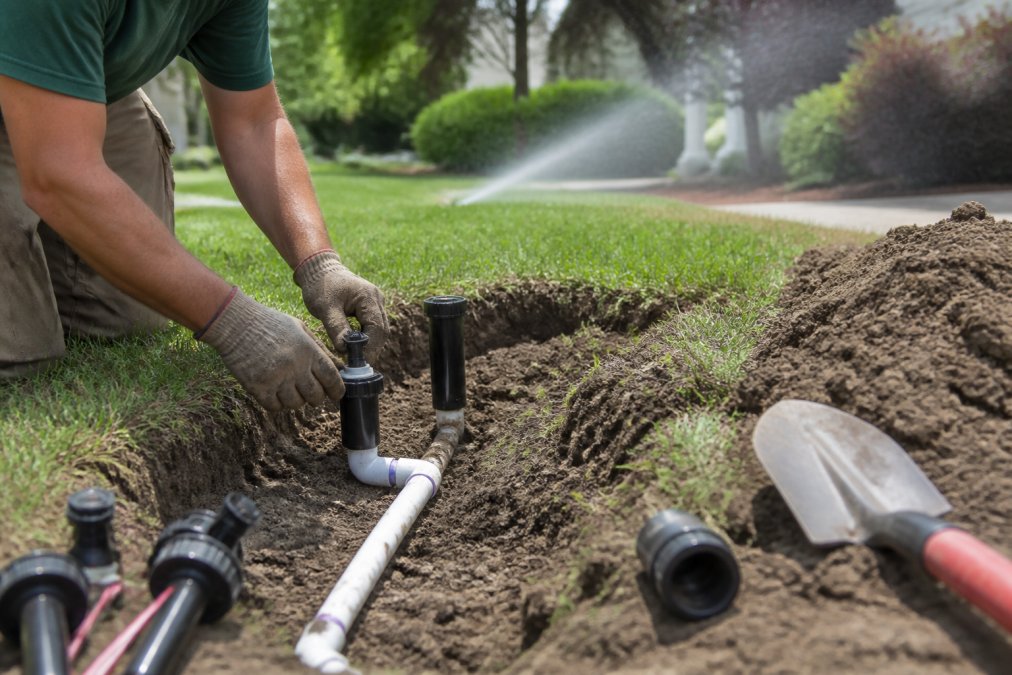
Mainline tubing carries water from the source to each zone; lateral lines distribute it to individual plants. Run mainline in straight, protected runs, bury it where foot traffic crosses, and keep it out of direct sun where UV degrades the tubing over time.
Lateral lines branch off the mainline through a manifold or direct fittings. Keep runs under the length your tubing diameter supports, since friction loss reduces pressure at the far end. If the last emitters in a run weep instead of drip, the run is too long or the tubing too narrow.
USDA Natural Resources Conservation Service guidance on irrigation water management notes that uniform distribution is the goal, because uneven application wastes water and creates patchy growth. That's a layout problem, not a parts problem.
Drip Irrigation Installation Best Practices for Emitters and Zones
Drip irrigation installation best practices come down to matching emitter output to plant needs and keeping every zone uniform. A common mistake is mixing emitters with different flow rates on one zone, which starves some plants while drowning others.
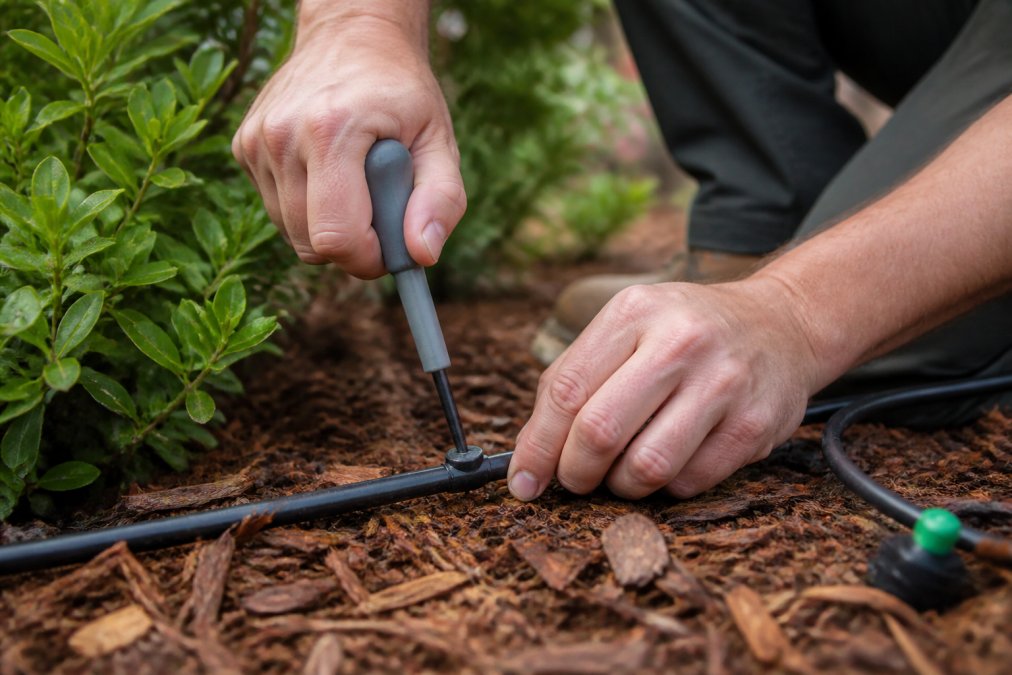
Place emitters at the root zone, not at the stem. For shrubs, two emitters on opposite sides encourage even root growth. For vegetable beds, inline drip tubing spaced to the plant rows saves hours of individual emitter work.
Smart Irrigation Controller Setup and Soil-Specific Scheduling
This is the section most irrigation guides skip entirely, and it's where modern systems earn their keep. A smart controller doesn't just add Wi-Fi to a timer, it replaces fixed schedules with evapotranspiration (ET) based watering, which adjusts runtime daily based on local temperature, humidity, wind, and solar radiation.
How ET-based scheduling actually works. The controller pulls a local ET value (usually in inches of water per day) from a weather network, multiplies it by a crop coefficient for your plant type, and converts that into a runtime for each zone. On a cool, humid day the ET value drops and the controller shortens the cycle. On a hot, windy day it lengthens it. You're no longer guessing; you're replacing a fixed number with a moving target that tracks the weather.
Setup steps that matter, in order:
- Enter your soil type per zone. Sandy soil holds roughly half the plant-available water of loam, and clay holds more but absorbs slowly. The controller uses this to calculate cycle-and-soak splits.
- Enter plant type per zone. Turf, shrubs, and vegetable beds have different crop coefficients. Mixing them on one zone defeats the purpose.
- Enter emitter type and precipitation rate. For drip, that's the GPH of your emitters divided by the area they cover, converted to inches per hour. Get this wrong and every runtime will be wrong.
- Enter slope. Sloped zones need shorter cycles with soak time between them, or water runs off before it infiltrates.
- Connect to a local weather source. Most controllers use either a nearby personal weather station or a regional ET network. Pick the closest source; a station ten miles away can be meaningfully different.
Soil-specific runtime math, in plain terms. Sandy soil: short cycles, more frequent, think two or three shorter runs per week rather than one long soak. Clay soil: longer, less frequent soaks with a soak period between cycles so water has time to move down instead of running off. Loam sits in the middle. The controller handles the split automatically once you've entered the soil type, but only if you've entered it correctly.
Add a soil moisture sensor if you want the biggest water savings. The sensor overrides the schedule when the root zone is already wet, which is where most of the actual savings come from, ET scheduling adjusts for weather, but a moisture sensor adjusts for what's actually happening in your soil. Pair the two and you get both weather responsiveness and ground-truth override.
Smart-home integration, briefly. Most current controllers expose a mobile app and integrate with major smart-home platforms for voice control and scene triggers. The practical value is remote monitoring: if a zone runs when it shouldn't, you'll see it in the app instead of on your water bill. Some controllers also support flow-meter add-ons that flag abnormal usage, a slow leak in a lateral line shows up as a small but persistent flow when no zone is scheduled.
A realistic expectation: a properly configured smart controller with a soil moisture sensor typically cuts outdoor water use noticeably compared to a fixed schedule, but the exact savings depend on your climate, soil, and how well the zones were designed in the first place. Smart scheduling can't fix a zone that mixes sun turf with shade shrubs, that's still a layout problem.
Testing, Leak Detection, and Your Irrigation System Maintenance Checklist
An irrigation system maintenance checklist keeps a working system working. Run each zone individually after installation, walk the line, and look for geysers, soggy patches, and emitters that weep instead of drip.
- Run each zone and check for uniform coverage
- Inspect all fittings and couplings for leaks
- Flush lateral lines at the end caps
- Clean or replace the filter element
- Check emitters for clogs and clear them
- Verify controller schedule against current weather
- Winterize before the first freeze
Winterization matters in this climate. Water left in the lines expands when it freezes and splits tubing and valves, so blow out the system or drain it before temperatures drop.
A modern irrigation system only performs as well as its installation, and the details that matter most, zone design, pressure control, and smart scheduling, are exactly where DIY installs tend to fall short. Four Seasons Landscaping NY handles irrigation design and installation as part of a full outdoor service, backed by more than 20 years of experience, a fully insured crew, and transparent quotes with no hidden fees. We also handle holiday lighting and décor, so one trusted team can cover your property year-round. Get your free quote and let us build a system that waters itself properly.
Frequently Asked Questions
What is the 30/30 rule for irrigation?
The 30/30 rule is a water conservation guideline: avoid watering when temperatures exceed 30 degrees or wind speeds exceed 30 mph, since most water evaporates or blows away before reaching roots. Many modern smart controllers factor wind and temperature into scheduling automatically, which is one reason irrigation system installation with a weather-aware controller saves more water than a basic timer.
What are common problems with irrigation systems?
The most frequent issues are clogged emitters from sediment, pressure spikes that blow fittings apart, and uneven coverage from poorly planned zones. Skipping a filtration system, omitting a pressure regulator, or forgetting to flush mainline tubing before attaching emitters causes most of these failures. A proper winterization routine and seasonal leak detection also prevent cracked lateral lines and valves after freezing temperatures.
How do I prevent pressure issues during irrigation installation?
Install a pressure regulator at the hose bib or valve manifold to keep PSI within the emitter manufacturer's range, typically 20 to 30 PSI for drip zones. Check static pressure with a gauge before designing zones, then split the system into smaller zones if flow rate exceeds what the mainline can supply. A backflow preventer protects the household supply, and a filtration system keeps debris from clogging emitters downstream.
How often should a modern irrigation system be inspected for leaks?
Inspect the system monthly during peak watering season and again before winterization. Walk each zone while it runs and look for soggy patches, geysers at fittings, and reduced flow at the last emitters on a lateral line, which signals a hidden leak or clog. Catching a cracked coupling or failed valve early prevents water waste and keeps your smart irrigation controller setup running on schedule.