 how-to
How to Design a Small Outdoor Kitchen Space
Table of Contents
- Measure Your Space and Visualize the Layout
- Choose the Right Location for Your Small Outdoor Kitchen
- Small Outdoor Kitchen Layout: Work Zones and Workflow
- Small Outdoor Kitchen Ideas: Essential Appliances and Cooking Stations
- Outdoor Kitchen Storage Ideas for Compact Spaces
- Outdoor Kitchen Design Tips: Materials and Durability
- Budget Planning and Cost Trade-Offs
- Frequently Asked Questions
Last Updated: October 8, 2026
Measure Your Space and Visualize the Layout
Designing a small outdoor kitchen space starts with understanding what you're working with. Before you pick a single appliance or material, you need accurate measurements and a clear picture of your available area.
Take time to document every dimension. Measure the length, width, and height of your space. Note where trees, structures, or utilities sit. Check for slopes or uneven ground. These details matter more than you'd think, they determine what layouts actually work.
Document Dimensions and Clearances
Get a tape measure and write down every measurement. Include the distance from your home to where you want the kitchen. Note how far utilities run. Take photos from multiple angles.
Here's what to measure:
- Total length and width of the space
- Distance from your home to the intended location
- Height clearance for any overhead structures
- Proximity to water and gas lines
- Existing trees, fences, or permanent features
- Ground slope or elevation changes
Clearances matter too. Your grill needs at least 3 feet of clear space on all sides for safety. Your sink requires space for people to work comfortably.
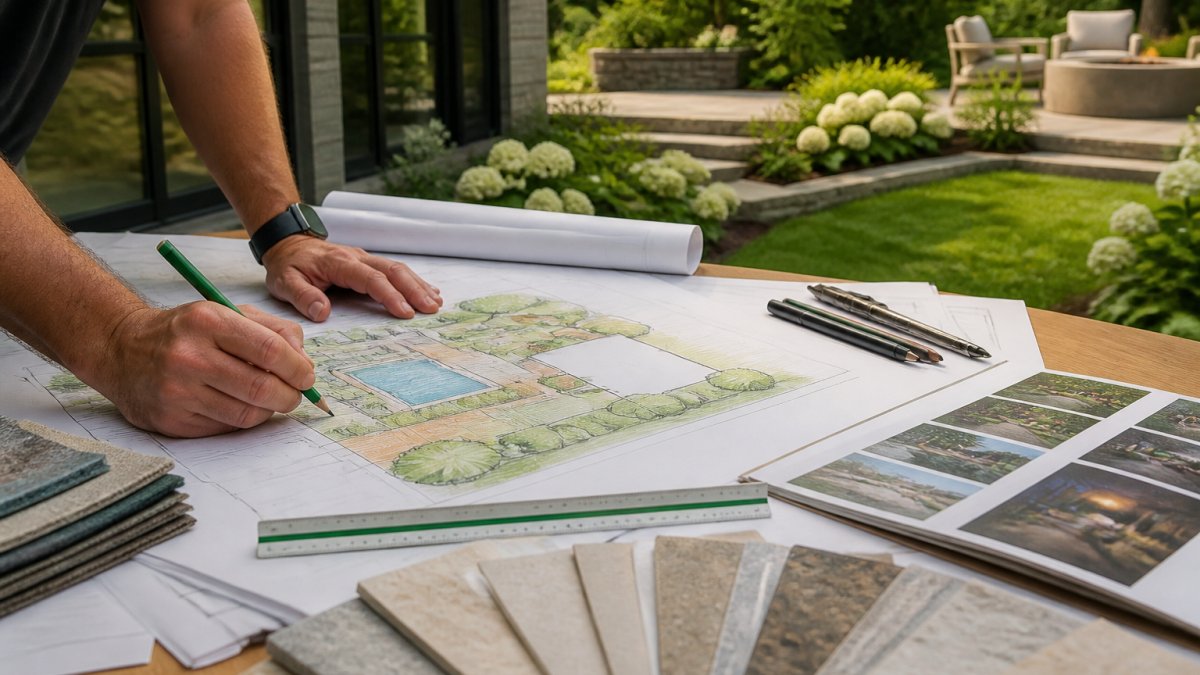
Sketch what you have on paper or use a simple digital tool. Don't worry about perfection, just get the dimensions down. This sketch becomes your baseline for every decision that follows.
Check Utilities and Permits
Before you commit to a location, verify what utilities exist and what permits you'll need.
Call your local utility companies. Ask them to mark underground lines. This is free and critical, hitting a gas line or electrical conduit during installation creates serious problems.
Check with your local building department about permit requirements. Many areas require permits for outdoor kitchens, especially if you're adding permanent structures or running new utilities.
Understanding these rules upfront saves money and headaches later. A permit might cost a few hundred dollars, but fixing a code violation after construction costs far more.
Choose the Right Location for Your Small Outdoor Kitchen
Location determines how much you'll actually use your outdoor kitchen. The wrong spot means dealing with harsh sun, wind, or being too far from where you entertain. The right spot becomes an extension of your home.
Sun Exposure and Weather Protection
Think about how the sun moves across your space throughout the day. A small outdoor kitchen space in full sun all afternoon gets brutally hot in summer.
Morning sun is generally ideal. It warms the space without creating intense midday heat. Afternoon shade, especially in hot climates, makes the space more comfortable.
Wind matters too. A location exposed to strong winds makes grilling difficult and uncomfortable.
Consider weather protection beyond just sun and wind. Rain and snow affect how often you use the space. A roof, pergola, or covered structure extends your season significantly.
If you're thinking ahead to the colder months, we also offer Holiday Lighting and Décor services that can transform your outdoor space into a festive gathering spot during the holiday season.
Proximity to Your Home and Utilities
Distance from your home matters more than most people realize. A kitchen that's too far becomes inconvenient. You'll avoid walking back and forth for supplies, ice, or forgotten items.
Ideally, your small outdoor kitchen space should be within 20-30 feet of your home's main entertaining area. This keeps traffic flowing naturally and makes entertaining easier.
Proximity to utilities is practical. Water lines, gas lines, and electrical service all cost more to extend.
Also consider sight lines from inside your home. You want to see your outdoor kitchen from your main living areas.
Small Outdoor Kitchen Layout: Work Zones and Workflow
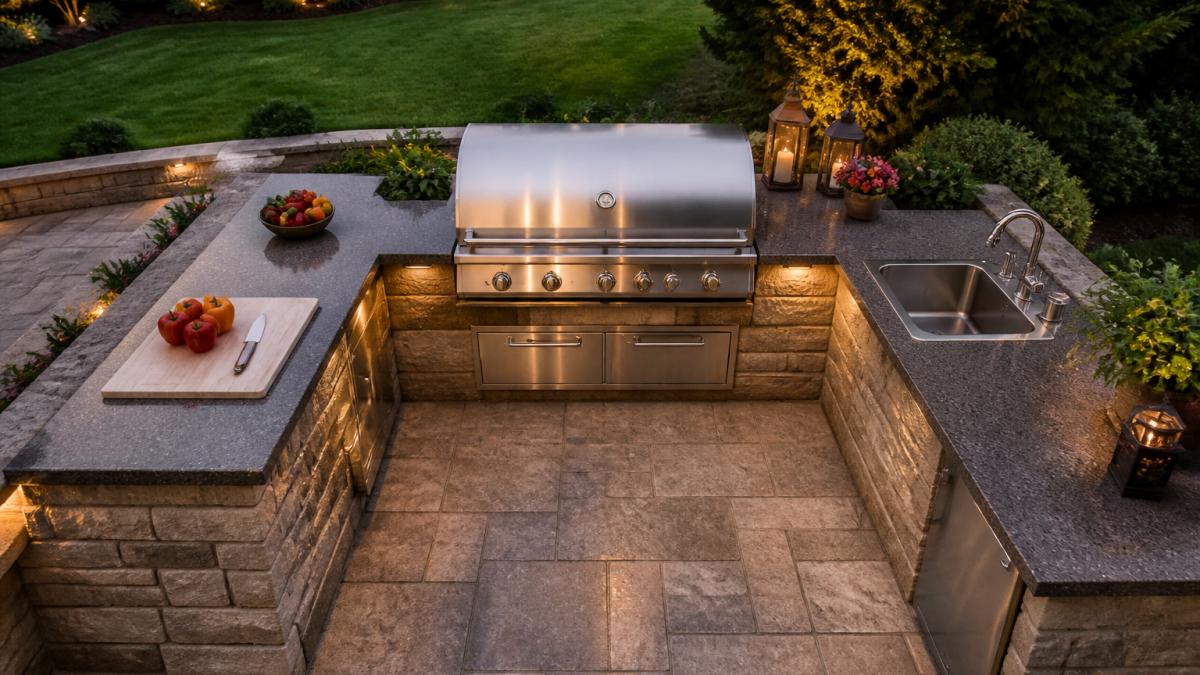
A functional small outdoor kitchen space organizes itself around work zones. These zones handle different tasks: prep, cooking, and cleanup. How you arrange them determines whether your kitchen flows smoothly or feels cramped.
The Three-Zone Approach
Think of your kitchen in three zones: prep, cooking, and cleanup.
The prep zone is where you cut vegetables, season meat, and get food ready. This needs a solid countertop and some storage nearby.
The cooking zone centers on your grill or main cooking appliance. This is your focal point.
The cleanup zone handles dirty work. Your sink goes here, along with trash and recycling. Position this zone where water can drain easily.
These three zones shouldn't overlap. A small outdoor kitchen space works best when each zone has a specific purpose and location.
Linear vs. L-Shaped Configurations
Two layouts dominate small outdoor kitchen design: linear and L-shaped.
A linear layout runs everything in a single line. This works for very tight spaces. It's simple and affordable. The downside: traffic flows through your work area, and zones get compressed.
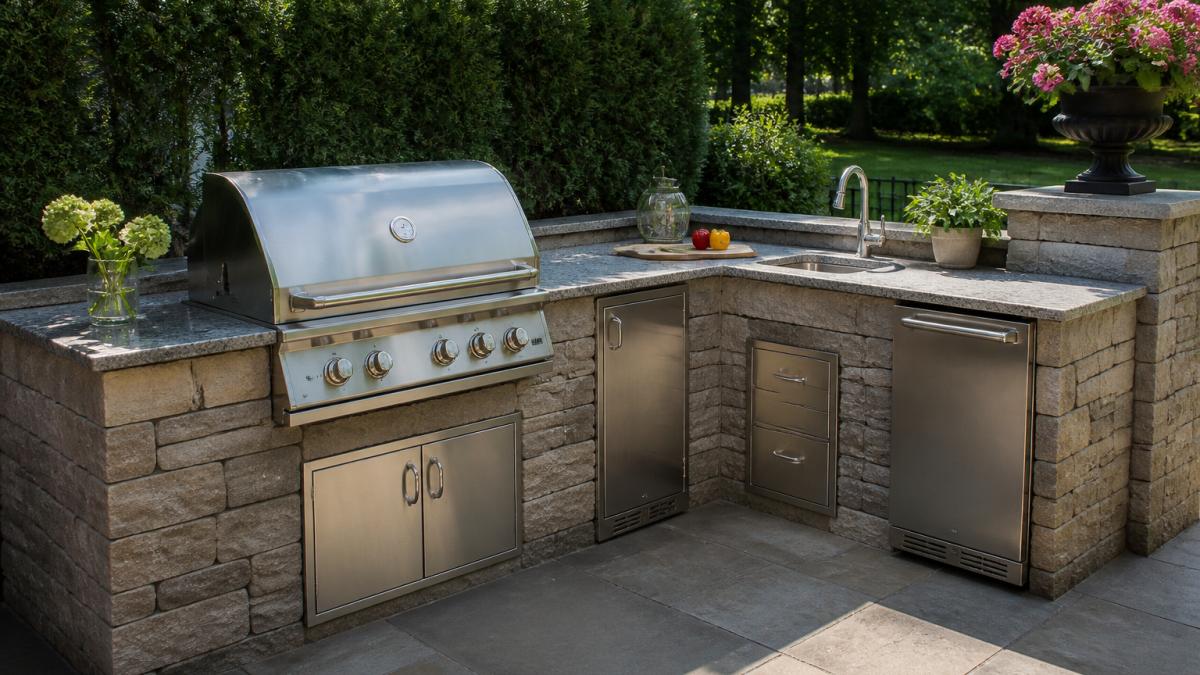
An L-shaped layout uses two perpendicular walls or runs. This separates zones better and creates a more natural workflow. You get more counter space without expanding the footprint.
For most small outdoor kitchen spaces, L-shaped wins. It balances functionality with space efficiency. If your area is under 100 square feet, linear might be your only option, and that's fine.
Small Outdoor Kitchen Ideas: Essential Appliances and Cooking Stations
You don't need every appliance to have a functional outdoor kitchen. In fact, too many appliances in a small space creates clutter and wasted money. Focus on what you'll actually use.
Grill Selection for Limited Space
Your grill is the centerpiece of any outdoor kitchen. For a small outdoor kitchen space, choose wisely.
Built-in grills work best. They integrate into your countertop and save space compared to freestanding models. A 30-36 inch grill handles most cooking needs.
Consider fuel type: gas, charcoal, or electric. Gas grills heat quickly and clean easily, ideal for frequent cooking. Charcoal grills deliver superior flavor but require more maintenance.
For a small outdoor kitchen space, a quality gas grill in the 30-36 inch range hits the sweet spot. It's powerful enough for entertaining but doesn't dominate the space.
Sink and Food Preparation Countertop
A sink transforms your outdoor kitchen from a grilling station into a real kitchen. You can rinse produce, clean fish, and wash your hands without running inside.
A small sink, 18-24 inches wide, works fine. You don't need a full kitchen sink.
Running water requires plumbing. This is a bigger job than many homeowners expect. You'll need to tap into your home's water line and plan for drainage.
Countertop space around the sink matters. You need at least 2-3 feet of counter space for food prep. Stainless steel, concrete, or stone all work.
Refrigeration and Ice Storage
Cold storage keeps drinks cold and food fresh. You have options depending on your budget and space.
A small outdoor refrigerator (24-30 inches wide) fits well in a compact kitchen. It keeps beverages and perishables accessible without running inside. Built-in models look more polished than freestanding units.
If a full fridge is overkill, an ice chest or cooler works. It's cheaper and takes less space. Fill it before guests arrive.
Some small outdoor kitchen spaces skip refrigeration entirely. You can rely on a cooler stocked with ice. This works if you're not cooking complex dishes that need ingredients chilled.
Outdoor Kitchen Storage Ideas for Compact Spaces
Storage is where most small outdoor kitchens fail. People underestimate how much they need to store, utensils, seasonings, tools, grilling accessories, serving pieces.
Without proper storage, your outdoor kitchen becomes cluttered and chaotic. Plan storage from the start.
Built-In Cabinetry and Modular Units
Built-in cabinets look finished and use space efficiently. They tuck underneath countertops and integrate with your overall design.
Outdoor cabinets must resist weather. Stainless steel, composite materials, or sealed wood hold up better than standard kitchen cabinets.
For a small outdoor kitchen space, modular units offer flexibility. You can add or remove components as your needs change. A simple base cabinet with a countertop works.
Drawers work better than shelves in outdoor kitchens. They keep items protected from weather and pests. Deep drawers store larger items; shallow ones organize utensils and tools.
Vertical Storage and Wall-Mounted Accessories
When floor space is limited, go vertical. Wall-mounted storage uses space efficiently and keeps items accessible.
Magnetic strips hold metal utensils. Pegboards organize tools. Hooks hang towels and aprons. Simple shelving stores serving pieces and supplies.
A small outdoor kitchen space benefits from every vertical inch. Install shelving above your countertop or grill. Mount a tool rack on a nearby wall. Hang utensils from a rod.
This approach keeps your workspace clear while storing everything you need within arm's reach.
Outdoor Kitchen Design Tips: Materials and Durability
Materials determine how long your outdoor kitchen lasts and how much maintenance it requires. Choose wrong and you'll be replacing things every few years.
Weather-Resistant Materials for Year-Round Use
Stainless steel handles moisture and temperature swings well. It resists rust and cleans easily.
Concrete is affordable and durable. It can crack in freeze-thaw cycles, but sealing helps. Concrete works well in milder climates.
Natural stone, granite, limestone, slate, looks beautiful but requires sealing and maintenance. It's expensive upfront but lasts decades with proper care.
Composite materials mimic wood without rot. They resist moisture and insects. They cost more than wood but need far less maintenance.
For a small outdoor kitchen space, stainless steel and sealed concrete offer the best balance of durability and cost.
Countertop Options and Maintenance
Stainless steel countertops are practical and professional-looking. They're easy to clean and highly durable. They can show fingerprints and require regular wiping.
Granite and marble are beautiful but porous. They stain easily and need sealing yearly.
Sealed concrete is budget-friendly and surprisingly durable. It can crack, but those cracks add character. Reseal it every 2-3 years.
Composite materials like quartz resist staining and require minimal maintenance. They cost more upfront but save work long-term.
For a small outdoor kitchen space that gets heavy use, sealed concrete or composite materials make sense. They're forgiving, affordable, and easy to maintain.
Budget Planning and Cost Trade-Offs
Building a small outdoor kitchen space requires choices.
Start with essentials: a grill, countertop, and basic storage.
A quality grill is worth the investment. You'll use it constantly. Cheap grills rust and fail quickly.
Countertop material affects both cost and longevity. Sealed concrete is affordable and practical.
Storage and cabinetry can be simple or elaborate. Basic shelving works fine.
Water and gas connections are expensive. If budget is tight, start with a simple setup.
At Four Seasons Landscaping NY, we help homeowners prioritize.
Designing a small outdoor kitchen space is about making smart choices with limited square footage.
The result is a functional outdoor kitchen that extends your home and enhances how you entertain. Our team handles everything from design to installation to year-round maintenance, so you get a finished space that's built to last.
Frequently Asked Questions
How much space do you need for a small outdoor kitchen?
A functional small outdoor kitchen requires a minimum of 8 feet by 10 feet, though 10 feet by 12 feet provides better workflow. This allows room for a grill, sink, countertop, and storage without feeling cramped. Measure your available space carefully, accounting for clearances from structures, property lines, and utility lines. Even smaller footprints work if you prioritize essential appliances and use vertical storage creatively.
What should a small outdoor kitchen layout include?
A functional small outdoor kitchen layout organizes three work zones: prep (sink and countertop), cooking (grill), and storage (cabinetry or shelving). Arrange these zones in a logical workflow, typically in a line or L-shape, to minimize steps between tasks. Include weather-resistant countertop space for food preparation, adequate clearance around the grill for safety, and accessible storage for tools and supplies. Keep the layout simple and avoid unnecessary appliances that consume valuable space.
What materials work best for a small outdoor kitchen?
Choose weather-resistant materials built to withstand moisture, temperature swings, and UV exposure. Stainless steel appliances resist rust and are easy to clean. Concrete, stone, or composite countertops handle outdoor conditions better than wood. Powder-coated metal cabinetry resists corrosion. For durability, avoid materials that require frequent sealing or maintenance. Quality materials cost more upfront but reduce repair and replacement costs over time.
Can you design an outdoor kitchen in a tiny backyard?
Yes, small outdoor kitchens work in tight spaces by using freestanding or modular units instead of built-in construction. A compact grill, portable sink, and open shelving can fit into 6 feet by 8 feet. Focus on multi-functional pieces and vertical storage. Consider a rolling cart for additional prep space. Even modest outdoor cooking setups enhance entertaining and property appeal without requiring extensive square footage.