 ultimate-guide
Custom Masonry Design for Patios: A 2026 Planning Guide
Table of Contents
- What Custom Masonry Design for Patios Actually Involves
- Luxury Outdoor Living Space Ideas That Hold Their Value
- Best Stone Materials for Patio Masonry
- Design Elements: Patio Layout, Walkways, and Retaining Walls
- Permits, Zoning, and Site Preparation You Should Plan For
- A Step-by-Step Project Timeline for Custom Patio Masonry
- Phase 1: Design and Scope (1-3 weeks)
- Phase 2: Permits and Utility Marking (1-4 weeks, if required)
- Phase 3: Site Preparation and Base (1-2 weeks)
- Phase 4: Setting Surface Material (1-3 weeks)
- Phase 5: Features and Finishing (1-2 weeks)
- Phase 6: Cleanup and Walkthrough (a few days)
- What Actually Causes Delays
- Patio Masonry Maintenance Tips for Every Season
- Frequently Asked Questions
Last Updated: September 13, 2026
What Custom Masonry Design for Patios Actually Involves
Custom masonry design for patios is the practice of building an outdoor floor and its surrounding structures from stone, brick, or concrete units cut and laid to fit one specific property, rather than assembling a kit of repeated panels. At Four Seasons Landscaping NY, we've spent more than 20 years building these spaces across Westchester County, and the difference between a custom build and a stock installation shows up in the first heavy rain.
A standard paver patio arrives as a fixed pattern. A custom patio starts with your grade, your drainage, and how you actually use the yard.
How Custom Work Differs From a Standard Paver Patio
Stock installations follow a template: excavate, compact, lay a base, drop in a repeating pattern, edge it, done. Custom work reverses the order. The design responds to the site.
- Layout bends around mature trees, property lines, and existing grade instead of fighting them
- Materials mix, so a flagstone field can meet a brick border or a granite step
- Elevation changes become features, not problems, through built-in steps and low retaining walls
- Drainage is engineered into the slope before a single stone is set
That last point matters most. Water that pools against a foundation causes more expensive damage than any surface crack.
Luxury Outdoor Living Space Ideas That Hold Their Value
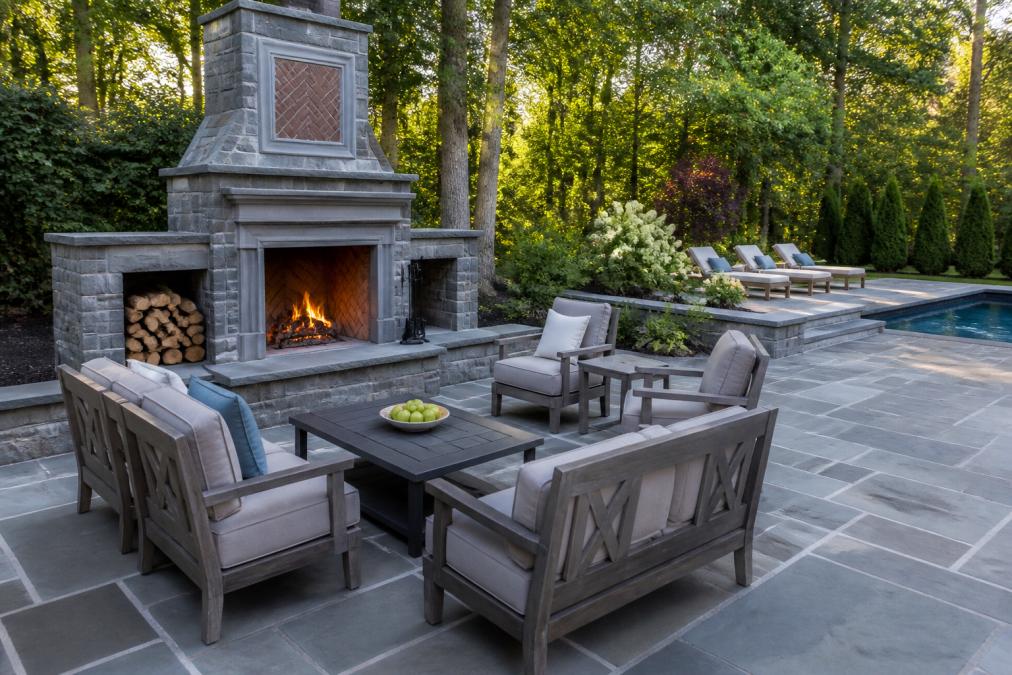
The luxury outdoor living space ideas that hold value share one trait: they extend the usable season. A fire feature, a covered kitchen zone, and a defined dining area turn a patio from a summer accessory into a room the family uses from early spring through late fall.
Homeowners in Scarsdale, Rye, and Bedford ask us for the same short list year after year:
- Built-in fire pits in stone or brick, sized for seating on all sides
- Outdoor kitchens with a masonry base, counter height set for comfortable prep
- Seating walls that double as retaining structure on sloped lots
- Integrated lighting in steps, walls, and planters for evening use
Best Stone Materials for Patio Masonry
The best stone materials for patio masonry come down to three families: natural stone, concrete pavers, and brick. Each behaves differently under foot, under frost, and under a budget, and the right pick depends less on looks than on how long you plan to stay, how the lot drains, and how much maintenance you're willing to sign up for.
Natural stone includes flagstone, bluestone, limestone, and granite. It offers irregular color and texture no manufactured product matches. Bluestone and granite handle freeze-thaw cycles well. Expect slower hand-fitting, higher material waste on irregular pieces, and a surface that patinas rather than wears out.
Concrete pavers are manufactured units with consistent dimensions. Interlocking pavers install faster and cost less per square foot than most natural stone. They also allow individual units to be lifted and reset if the base shifts, a real advantage on lots with clay soils or tree roots.
Brick masonry suits borders, steps, and accent walls. It reads traditional and pairs well with natural stone fields. Brick is dimensionally stable and repairable by repointing, but it's typically a supporting material rather than a full patio field.
A Cost-Benefit View Most Guides Skip
Instead of comparing sticker prices, compare the three families on the variables that actually drive long-term value: lifespan, repairability, maintenance load, and resale contribution.
| Material | Typical Lifespan | Repair Style | Maintenance Load | Best Fit |
|---|---|---|---|---|
| Natural stone | Decades with a sound base | Replace individual stones | Periodic sealing, joint refill | High-visibility primary patios |
| Concrete pavers | Long service life; base-dependent | Lift and reset units | Occasional joint sand top-off | Large fields, budget-conscious builds |
| Brick | Long service life | Repoint or replace | Repointing every several years | Borders, steps, accent walls |
A few patterns hold across most projects:
- Natural stone tends to hold its character longest but demands the most skilled labor up front, which is where the cost difference lives.
- Concrete pavers win on repairability. If a utility trench is cut or a section settles, individual units come up and go back down without a visible scar.
- Brick is the best value as a secondary material. Used as a border or step tread, it adds visual warmth for a fraction of a full-field upgrade.
What Actually Determines Longevity
What most guides miss is the base. A properly compacted gravel base with correct drainage outlasts the surface material every time, whichever family you choose. A natural stone patio on a bad base will fail before a concrete paver patio on a good one. When you weigh materials, weigh the installer's base and drainage spec at the same time, that's the line item that decides whether the surface is still flat in fifteen years.
Design Elements: Patio Layout, Walkways, and Retaining Walls
Design elements are where a patio stops being a slab and becomes a landscape. The layout sets traffic flow, walkways connect the patio to the rest of the property, and retaining walls solve grade while adding seating and planting space.
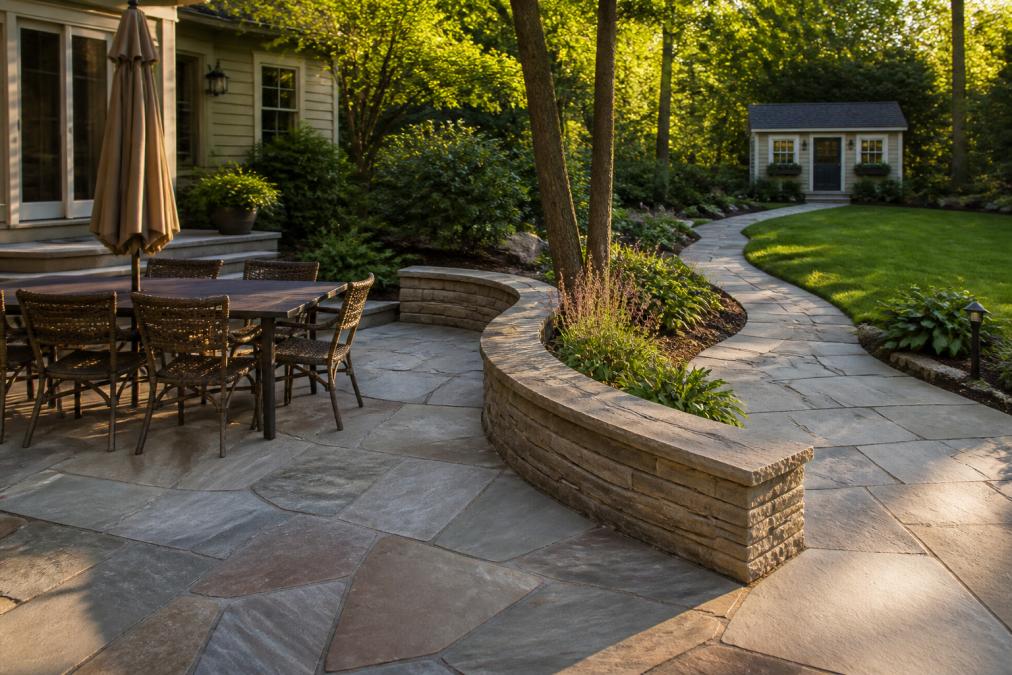
A patio layout should follow how people move. Put the grill where smoke won't drift into seating. Keep the main walkway at least wide enough for two people to pass. Curve a path rather than running it straight from the driveway, and let it land where the eye wants to go.
Retaining walls do structural work first. They hold back soil on sloped lots, control erosion, and manage drainage. The seating and planters are a bonus.
Permits, Zoning, and Site Preparation You Should Plan For
Permits and zoning are the step most homeowners underestimate. Requirements vary by municipality, and a patio that changes grade, adds a retaining wall above a certain height, or includes a fire feature may need review before work starts.
Site preparation follows a fixed sequence regardless of design:
- Call 811 before any excavation to mark underground utilities (call811.com)
- Strip topsoil and confirm the subgrade is stable
- Excavate to the depth your base and surface require
- Compact the gravel base in lifts
- Set the drainage slope away from the house
- Lay, cut, and set the surface material
- Edge, seal where appropriate, and backfill planting beds
Check your local building department for the specific rules that apply to your lot. U.S. EPA guidance on stormwater and runoff explains why grading and drainage decisions matter beyond your property line.
A Step-by-Step Project Timeline for Custom Patio Masonry
A custom patio typically runs four to eight weeks from design approval to final walkthrough, depending on size, material, and weather (angi.com). But the calendar homeowners care about starts earlier, at the first design conversation, and the phases that slip are rarely the ones people expect. Here's the sequence we follow, with the mechanics behind each stage.
Phase 1: Design and Scope (1-3 weeks)
This phase sets everything downstream. It includes a site visit, measurements, a discussion of how you actually use the yard, material selection, and a written scope. The variable that stretches this phase is decision-making, not drafting. Homeowners who arrive with a clear list of must-haves and a rough budget range move through in days; those still comparing three directions can take weeks.
Phase 2: Permits and Utility Marking (1-4 weeks, if required)
If the project changes grade, adds a retaining wall above your municipality's threshold, or includes a fire feature, plan for review time. This is the single most underestimated phase. A patio that needs no review can start immediately; one that needs a zoning or building review can sit for weeks before a shovel touches the ground. Call 811 for utility marking at least a few business days before excavation, it's free and required before any digging.
Phase 3: Site Preparation and Base (1-2 weeks)
This is the phase that determines whether the patio lasts. The sequence is fixed:
- Strip topsoil and confirm the subgrade is stable
- Excavate to the depth your base and surface require
- Compact the gravel base in lifts, thin layers, compacted one at a time, not one thick dump
- Set the drainage slope away from the house
- Verify grade before any surface material arrives
On sloped lots, this phase also includes the retaining structure that holds the new grade. Skipping or rushing base compaction is the most common cause of a patio that looks fine for one season and then settles unevenly.
Phase 4: Setting Surface Material (1-3 weeks)
Lay, cut, and set the stone, pavers, or brick. Natural stone takes longer because pieces are hand-fit and cut on site; concrete pavers move faster because they're modular. This is also when borders, steps, and pattern changes get resolved.
Phase 5: Features and Finishing (1-2 weeks)
Retaining walls, steps, fire features, lighting, and any built-in seating or kitchen elements go in here. Finishing includes edging, sealing where appropriate, and backfilling planting beds.
Phase 6: Cleanup and Walkthrough (a few days)
Final cleanup, a walkthrough with the installer, and a maintenance briefing. Ask for the maintenance schedule in writing, sealing intervals and joint refill timing vary by material.
What Actually Causes Delays
Labor is rarely the bottleneck. The two biggest sources of slippage are:
- Material lead times. Natural stone and specialty brick are often cut or quarried to order. A written schedule should list the material order date, not just the install date.
- Permit review windows. If your project needs review, that clock starts when the application is complete, not when you first call the office.
Weather matters too, but mostly in winter and early spring, when freeze-thaw cycles can pause base work. A realistic schedule builds in a weather buffer rather than pretending it won't happen.
Patio Masonry Maintenance Tips for Every Season
Patio masonry maintenance tips follow the calendar. What you do in October protects the surface through February.
- Spring: Rinse the surface, inspect joints, and refill any sand or polymeric joints that have washed out
- Summer: Sweep regularly, clean spills quickly, and check that drainage still flows away from the house
- Fall: Clear leaves from joints and drains before the first freeze, and seal natural stone if it needs it
- Winter: Use plastic or rubber-edged tools instead of metal to clear snow, and avoid rock salt on stone surfaces
Sealing is not annual by default. Natural stone and concrete pavers vary in porosity, so seal on the manufacturer's or installer's recommendation rather than on a fixed schedule.
A custom patio is a construction project, not a purchase, and the variables that decide how it turns out are the ones set before the first stone is laid: drainage, base compaction, material fit, and a schedule that accounts for lead times. Four Seasons Landscaping NY handles design, masonry, irrigation, and year-round maintenance as one team, with transparent quotes and no hidden fees, so you're not coordinating three contractors who blame each other when something goes wrong. We also offer Holiday Lighting and Décor for clients who want their outdoor spaces looking their best through the winter months. We're family-owned, fully insured, and we've been building outdoor spaces on properties like yours since 2004. Get your free quote and let's put your patio on the calendar before the season fills up.
Frequently Asked Questions
What is the best type of stone for a patio area?
It depends on how you use the space. Flagstone and bluestone handle freeze-thaw cycles well and give a natural, irregular look that suits luxury outdoor living space ideas. Travertine stays cooler underfoot in full sun. Concrete pavers offer the most consistent sizing and the widest color range. Ask your mason to show samples of each in the finish you want, because texture and color shift noticeably between a dry sample and a sealed, installed surface.
What are the most durable stone materials for custom patio masonry?
Granite, bluestone, and dense flagstone hold up best in northern climates where freeze-thaw cycles stress every joint and edge. Durability also comes from what sits under the stone: a compacted gravel base, proper drainage slope, and correct mortar or joint sand matter as much as the surface material. A premium stone installed over a weak base will crack before a mid-grade stone installed correctly ever does.
How does custom masonry design increase property value?
A well-built patio extends usable living space, which buyers in high-end markets notice during showings. The value comes from three things: curb appeal, a layout that fits the house rather than fighting it, and materials that still look sharp after several winters. Appraisal treatment varies by market, so treat the patio as a long-term improvement you will enjoy rather than a guaranteed dollar-for-dollar return.
How long does a professional masonry patio installation take?
Most residential patios take two to four weeks of on-site work, but the full timeline runs longer. Design consultation and material selection add one to two weeks, permitting can add several more depending on your municipality, and weather delays are common in spring and fall. A realistic schedule from first consultation to final walkthrough is often six to ten weeks. Get the timeline in writing before you sign.
What is the difference between natural stone and concrete pavers for patios?
Natural stone is quarried and cut, so every piece varies in color and thickness, which is exactly what gives a custom patio its character. Concrete pavers are manufactured to uniform dimensions, install faster, and cost less per square foot. Natural stone typically ages better and can be re-polished or re-sanded, while pavers are easier to replace piece by piece if one cracks.
What design elements should be included in a luxury custom patio?
Start with the layout: how people move from the house to the patio, where the sun hits at dinner time, and whether you want one large gathering area or separate zones. Then layer in the hardscape features that earn their space, such as a fire pit, an outdoor kitchen, integrated seating walls, and lighting. Walkways and retaining walls should be designed at the same time, not added later, so the materials and grades line up.